A Bohme Cooked Meal

Sunday, July 5, 2020

Gluten Free Kentucky Butter Cake


This was one of the better gluten-free desserts that I have made.  High-quality ingredients help make this amazing.  You can either make this in a bundt pan or 2 loaf pans.  I made them into loaf pans and took one to work and one camping with me. Each loaf serves 6 hefty servings. I served with cool whip and macerated strawberries.  This cake is tender and moist and was the perfect summer dessert!  I want to take this cake base and make pineapple upside-down cake!


Pound Cake


  • 1 1/2 cups (3 sticks) salted butter (I used Kerrigold Butter)
  • 1 (8 oz.) package cream cheese (or use the lighter cream cheese: Neufchâtel)
  • 2 cups white sugar
  • 1 Tbsp. vanilla extract
  • 1 tsp. almond extract
  • 6 eggs
  • 2 2/3 cups good quality gluten-free flour blend (I used Bob Mills 1:1)
  • 1/3 cup corn starch


Butter Sauce


  • 1/3 cup butter (I used Kerrigold Butter)
  • ¾ cup sugar
  • 2 tbsp water
  • 2 tsp vanilla


INSTRUCTIONS

1.   Preheat oven to 325°. Spray a bundt pan or 2 loaf pans with non-stick cooking spray.

2.   In the bowl of your electric mixer, cream together the butter, cream cheese and sugar until light (medium speed -about 5 minutes).

3.   Add the vanilla and almond extracts and beat another 30 seconds to mix well.

4.   Place a sifter/sieve/strainer over a bowl. Measure the flour, cornstarch, and xanthan gum, and dump into the sifter. Sift together the dry ingredients. You can repeat to sift another time or I just used a whisk and really whisked them together well.

5.   Break the 6 eggs into another bowl and set aside.

6.   With your mixer on low, alternately add the flour mixture and the eggs to your butter/sugar mixture, beginning and ending with the flour mixture.

7.   Pour batter into the prepared pan(s).

8.   Bake at 325° for 1 hour and 15 minutes or until toothpick inserted in the center comes out clean. Allow to cool in pan, then gently loosen the sides with a table knife or plastic spatula before turning over onto serving plate.

9.   Butter Glaze- Add butter and sugar to saucepan and mix together.  Add water and vanilla and mix. Cook on medium heat until the sugar is dissolved. Poke small holes in the cake and pour warm glaze over the cake. Cook the cake and serve.

NOTES

As always, be sure to double-check your ingredients for gluten. Feel free to try this with your preferred gluten-free flour blend, but I only guarantee a delicious, non-gritty result if you use one of the flours I recommend!

https://www.backtomysouthernroots.com/kentucky-butter-cake-with-a-butter-glaze/

http://mygluten-freekitchen.com/cream-cheese-almond-pound-cake-gluten-free/

Caramel Churro Chex Mix


Recipe from http://www.confessionsofacookbookqueen.com/caramel-churro-chex-mix/
Prep Time: 15 minutes

Cook Time: 7 minutes

Total Time: 22 minutes

Yield: 15 servings

Ingredients

9 cups Corn Chex™ cereal
1 cup packed brown sugar
1/2 cup (1 stick) salted butter
1/4 cup light corn syrup
1/4 teaspoon baking soda
2/3 cup granulated sugar
2 teaspoons ground cinnamon

Instructions

Preheat oven to 350. Place cereal in a large, heat-safe bowl. Line a large baking sheet with foil and spray with nonstick baking spray.

In a small bowl, combine cinnamon and sugar and set aside.

In a heavy saucepan over medium heat, heat brown sugar, butter, and corn syrup until the mixture comes to a boil. Let boil for one minute, stirring constantly, then remove from heat and stir in baking soda. Pour over cereal and stir until cereal is coated.

Spread cereal on a prepared baking sheet. Sprinkle evenly with cinnamon/sugar mixture. Bake for about 5 minutes, then flip with a spatula and bake for 3 more minutes, until cereal turns golden brown. Remove from oven and let cool completely, then break up and store in an airtight container.

Samoa Truffles-GF

Dayum.  These are AMAZING!   Give up buying those boring and lame Girl Scout Cookies and get your hands on these amazing flavor bombs.  We kept them in the freezer and they are still chewy straight from the freezer.   These were perfect to bring camping!

Recipe adapted from https://www.shugarysweets.com/samoa-truffles/

Ingredients

7 oz sweetened, shredded coconut
1 can dulce de leche (14 oz)
1 can sweetened condensed milk (14 oz)
1 box (11oz) Nilla Wafer cookies, crushed (about 2 cups crushed) or GF animal crackers
8 oz Ghirardelli dark chocolate wafers

Instructions

On a large baking sheet, spread coconut into a single layer. Bake in a 350 degree oven for 10-15 minutes, until lightly browned. Be sure to turn and flip the coconut every 5 minutes. Remove from oven.

In a bowl, combine coconut, dulce de leche, sweetened condensed milk and cookie crumbs. Stir until well combined.

Line a baking sheet with parchment paper. Scoop one tablespoon of mixture (I use this scoop) onto the parchment paper. Repeat until all mixture is used. Place the baking sheet in the freezer and freeze for about 30 minutes.

Melt chocolate wafers according to package directions (about 1 1/2 minutes in the microwave, stirring every 30 seconds). Dip the bottom of each truffle in melted chocolate and return to parchment paper.

Once all truffles are dipped, put the remaining chocolate into a small ziploc bag. Snip off the corner and drizzle over truffles. Store in the refrigerator (or freezer) in an airtight container.

We made these gluten-free by substituting Nilla Wafers for gluten-free animal crackers.

Monday, May 25, 2020

Triple Cinnamon Scones

TRIPLE CINNAMON SCONES


scones
3/4 cup half and half or evaporated milk
1 cup cinnamon Flav-R-Bites or cinnamon chips
2 3/4 cups King Arthur Unbleached All-Purpose Flour
1/3 cup sugar
1 tablespoon baking powder
3/4 teaspoon salt
1/2 cup cold butter, cut into pats
2 large eggs, lightly beaten
1 teaspoon vanilla extract
filling
3/4 cup Baker’s Cinnamon Filling*
3 tablespoons water
*Or substitute 5 tablespoons butter, 3/4 cup brown sugar, and 2 tablespoons ground cinnamon for the Baker’s Cinnamon Filling mix and water.
glaze
3 1/2 cups confectioners’ sugar
1 teaspoon ground cinnamon
7 tablespoons water
Directions
1) Combine the Cinnamon Flav-R-Bites with the half and half or milk in a small bowl. Let the mixture rest for about 20 minutes.
2) While the cinnamon mixture is resting, get started putting together the rest of the ingredients. In a large mixing bowl, whisk together the flour, sugar, baking powder, and salt.
3) Work in the butter just until the mixture is unevenly crumbly; it’s OK for some larger chunks of butter to remain unincorporated.
4) Add the eggs and vanilla to the cinnamon-milk mixture, stirring to combine.
5) Add the liquid ingredients to the dry ingredients and stir until all is moistened and holds together.
6) Scrape the dough onto a well-floured work surface. Pat/roll it into a rough 9″ square, a scant 3/4″ thick. Make sure the surface underneath the dough is very well floured. If necessary, use a giant spatula (or the biggest spatula you have) to lift the square, and sprinkle more flour underneath.
7) Spread the filling over the dough. Fold one edge into the center and over the filling, as though you were folding a letter. Fold the remaining edge over the center to complete the three-fold. You’ll now have a rectangle that’s stretched to about 4″ x 12″. Gently pat/roll it to lengthen it into a 3″ x 18″ rectangle; it’ll be between 3/4″ and 1″ thick.
8) Cut the rectangle into six 3″ squares. Transfer the squares to a lightly greased (or parchment-lined) baking sheet. Now you have a choice. For large scones, cut each square in half diagonally to make a triangle; you’ll have 12 scones. For medium scones, cut each square in half diagonally again, making four triangular scones from each square. Gently separate the scones (if you like scones with crunchy edges), leaving about 1″ between them. For softer scones, separate the scones just enough to break contact between them.
9) You may also choose to make scone strips, or tiny squares. Cut each 3″ square into three 1″ x 3″ rectangles, for a total of 18 scone strips. Gently separate the strips, leaving about 1/2″ between them. Or cut each 3″ square into nine 1″ squares, to make 54 bite-sized mini scones.
10) For best texture and highest rise, place the pan of scones in the freezer for 30 minutes, uncovered. While the scones are chilling, preheat the oven to 425°F.
11) Bake the scones for 16 to 20 minutes, or until they’re golden brown. Remove the pan from the oven, and allow the scones to cool right on the pan.
11) Make the glaze by stirring together the sugar, cinnamon, and water. If the sugar seems particularly lumpy, sift it first, for an extra-smooth glaze.
12) Now you’re going to coat each scone with glaze. You can dip each one individually, which is quite time-consuming. Or line a baking sheet (with sides) with parchment, and pour about half the glaze atop the parchment. Set the scones atop the glaze, swirling them around a bit to coat their bottoms. Then drizzle the remaining glaze over the top. Use a pastry brush to brush the glaze over each scone, to coat it entirely. The glaze is very thin, so this is easily done.
13) Transfer the scones to a rack set over parchment, to catch any drips. As you pick each scone up, run its sides over the glaze in the bottom of the pan, both to use up some of the extra glaze, and to make sure all sides are coated. Allow the glaze to set before serving the scones.
Yield: one dozen triangles, 5″ x 3″; 2 dozen triangles, 2 1/2″ x 3″; 18 strips, 4″ x 1 1/2″; or 54 mini (1 1/2″) squares


Sunday, May 3, 2020

Chocolate Chip Cookies

Chocolate Chip Cookies
Source: Unknown


Prep Time 10 minutes

Cook Time 10 minutes

Total Time 20 minutes

Servings 24 servings


Ingredients

1 cup unsalted butter softened to melted
1 cup white sugar
1 cup packed brown sugar
2 large eggs
1 tablespoon vanilla extract
3 cups flour
1 teaspoon baking soda
1/2 teaspoon salt
2 cups semisweet chocolate chips
Instructions

Preheat oven to 350 degrees.
To a stand mixer cream together the butter, sugar and brown sugar until light and fluffy, about 2-3 minutes.
Add in the eggs one at a time along with the vanilla.
Sift the flour and baking soda and add it to the stand mixer along with the salt on low speed until just combined and stir in the chocolate chips.
Using 1/4 cup scoops bake the cookies 6 to a sheet and bake for 10-12 minutes.

Brown Butter Toffee Chocolate Chip Cookies

Recipe source https://tasty.co/recipe/brown-butter-toffee-chocolate-chip-cookies


 **Note: These cookies have AMAZING FLAVOR but spread a lot in the oven.

Ingredients
for 9 cookies

TOFFEE

6 tablespoons unsalted butter
¾ cup light brown sugar, lightly packed
1 teaspoon kosher salt
water, as needed
COOKIE DOUGH

1 cup unsalted butter
4 ice cubes
¾ cup granulated sugar
1 ½ cups dark brown sugar, packed
2 teaspoons espresso powder
2 teaspoons kosher salt
½ teaspoon baking soda
2 large eggs
2 teaspoons vanilla extract
2 ½ cups all purpose flour
6 oz cacao chocolate, 50-70% cacao, chopped
flaky sea salt, for sprinkling
Nutrition Info

Preparation
Make the toffee: Line a baking sheet with parchment paper.
In a medium nonstick saucepan over medium heat, melt the butter, brown sugar, and salt, stirring until evenly incorporated. If there are grainy lumps or if the fat starts to separate, add a couple splashes of water and stir vigorously to emulsify. Continue to cook, stirring constantly, until the mixture reaches 290°F (143°C), about 10-15 minutes.
Pour the toffee onto the prepared baking sheet and spread out slightly with a spatula. Freeze until ready to use, about 30 minutes.
Make the cookie dough: Add the butter to a medium nonstick saucepan over medium-high heat. Cook, stirring occasionally, until the butter turns dark brown and smells nutty. Watch carefully so the butter does not burn. Remove the pot from the heat.
Add an ice cube to the butter and slowly let it melt. It may froth and bubble. Add the remaining 3 ice cubes and gently stir until melted.
In a large bowl, combine the granulated and brown sugar, espresso powder, salt, and baking soda.
Pour the brown butter into the sugar mixture and mix until combined. Don’t worry if it looks separated.
In a small bowl, whisk together the eggs and vanilla. Pour into the sugar and butter mixture and whisk until glossy and smooth.
Add the flour and fold with a rubber spatula to incorporate until the dough has no visible flour streaks.
Remove the toffee from the freezer (it should be a frozen disc) and break it into chunks that will fit inside a gallon zip-top bag. Double bag the toffee and seal both bags. With a rolling pin, break the toffee into small pieces.
Fold the crushed toffee and chopped chocolate into the dough until evenly distributed.
Using a large ice cream scoop or a ½ cup (65 g) measure, scoop the dough onto a parchment-lined baking sheet. Wrap the baking sheet in plastic wrap, but leave a small opening at the corner of the tray. Let the dough rest in the refrigerator for at least 36 hours. This will allow the flavor to develop and the dough to dry out a little as it rests, which will result in less spread when it bakes.
When ready to bake, preheat the oven to 325°F (163°C). Line 2 baking sheet with parchment paper.
Arrange the cookies on the baking sheets, leaving at least 2 inches (5 cm) of space between the cookies and away from the edges of the pan.
Bake until the cookies are golden brown with crispy edges, but are still slightly soft in the center, 18-20 minutes.
Immediately sprinkle the cookies with flaky sea salt. then let cool completely. The cookies will be very soft at first but will set after they are fully cooled.
Enjoy!

Saturday, April 25, 2020

Sourdough English Muffin


Sourdough English Muffins Recipe


https://littlespoonfarm.com/sourdough-english-muffins-recipe/

Prep Time
20 mins
Cook Time
8 mins
Fermenting Time
12 hrs
Total Time
12 hrs 28 mins

Ingredients
1/2 cup (100 g) sourdough starter (levain) (active)
1 tablespoon (20 g) honey (sugar or maple syrup can be substituted)
1 cup (240 g) milk
3 cups (360 g) all-purpose flour
1 teaspoon (5 g) fine sea salt
1/4 cup (40 g) cornmeal (for sprinkling)
Instructions
Prepare sourdough starter in advance: You will need to prepare the starter before you begin mixing the dough. To a clean jar add 12g starter + 50g water + 50g flour and let rise until doubled. Depending on the temperature of your kitchen and the maturity of your starter, this can take anywhere from 4-12 hours. *See notes.
The night before cooking
Add all of the ingredients (except corn meal) to a large bowl and use your hands to mix until well combined. Cover and let rest 30-60 minutes. Turn the dough out onto a floured surface and knead the dough for 5 minutes.
Place the dough back into the bowl, cover and let ferment on the counter at room temperature 10-14 hours. (Room temperature is 65-70°)
The next morning
Turn the dough out onto a floured surface, flour the top of the dough and press it out using your fingertips until it is 1/2" in thickness.
Use a 3" biscuit cutter to cut rounds and place them on a parchment lined baking sheet that's been sprinkled with cornmeal. Sprinkle the tops with cornmeal, cover with a tea towel and allow to rise for 1 hour at room temperature.
Preheat your non-stick skillet over LOW heat. Place 4 muffins into the skillet spaced 2" apart, cover and cook the first side for 4 minutes. Turn the muffins over and cook for an additional 4 minutes.
Notes
The "levain" is the amount of active starter we prepare to mix into the dough.
A stand mixer with a dough hook attachment can be used to knead to the dough. Mix on lowest speed for 5 minutes.
Make sure to cook the muffins over very low heat.
Freeze for up to 3 months.
Store at room temperature for up to 5 days in a container.

Apple Pancake

Our family used to eat a version of these apple pancakes.  I am so happy I found this recipe.

German Apple Oven Pancake


Adapted from http://secretingredientislove.blogspot.com/2012/02/german-apple-oven-pancake.html?m=1
German Apple Oven Pancake

1 cup all-purpose flour
2 tablespoon sugar
1 teaspoon salt
1 1/3 cup half-and-half
4 large eggs
2 teaspoon vanilla extract
3 tablespoon unsalted butter (divided)
2 medium granny smith apples, peeled, cored, quartered, and sliced 1/4-inch thick
1/2 cup packed light brown sugar
1/4 teaspoon ground cinnamon

powdered sugar for dusting

Directions
Adjust an oven rack to the upper-middle position and heat the oven to 500 degrees F. Place your cast iron pan in the oven to heat up. Allow the oven to heat for at least 15 minutes before baking the pancake. In a blender or food processor, blend the eggs, sugar, half and half, vanilla and salt for about 15 seconds. Add the flour and blend until the mixture is smooth with no lumps, about 25 seconds.

Melt  1tblsp butter in a 10-inch your heated cast iron skillet over medium-high heat. In a different non-stick pan, add the remaining butter, apples, brown sugar, and cinnamon and cook, stirring often, until the apples are golden brown, about 8 minutes. Pour apples into your buttered cast iron.


Quickly pour the batter around the edge of the skillet first, then over the apples.


Place the skillet in the oven and immediately reduce the oven temperature to 425 degrees F. Bake until the pancake is brown and has risen about the edges of the skillet, about 16 to 17 minutes.


Loosen the pancake edges from the hot skillet with a heat-proof spatula and flip the pancake onto a large plate or serving platter. Dust with powdered sugar, cut into wedges, and serve immediately.

Cinnamon Rolls


Pioneer Woman’s Cinnamon Rolls
Adapted from https://www.savingdessert.com/pioneer-womans-cinnamon-rolls/


Prep Time
30 mins
Cook Time
15 mins
Total Time
1 d 2 hrs 15 mins

Makes 3 pans
Ingredients

For the cinnamon rolls:
2 cups whole milk
½ cup vegetable oil
½ cup granulated sugar
1 (.25 ounce) package Active Dry Yeast
4 ½ cups all-purpose flour, separated
½ teaspoon (heaping) baking powder
½ teaspoon baking soda
1 teaspoon salt

For the filling:
3 tablespoons unsalted butter, melted for greasing pans
15 tablespoons unsalted butter, melted
⅔ cups granulated sugar
3 tablespoons ground cinnamon
2 tablespoons cardamom

For the frosting:
8 ounces powdered sugar, sifted (1 cup)
4 oz. cream cheese
½ teaspoon vanilla
2 tablespoons milk
1 tablespoon unsalted butter, melted
1 tablespoon strong brewed coffee
pinch of salt

Instructions
To make the dough:
Mix the milk, vegetable oil and sugar in a small sauce pan. Warm over medium heat just until the sugar is dissolved and the mixture reaches 95-100 F (lukewarm) on an instant read thermometer. Remove from the heat and pour into a large mixing bowl. Cool, if needed, until the milk reaches 95° to 100° F on an instant read thermometer.

Sprinkle the yeast over the lukewarm milk mixture and set aside for 5-10 minutes. Add 4 cups of the flour and stir until combined (you can do this by hand with a wooden spoon or use the dough hook of a stand mixer). Cover and let rise for one hour in a warm location. The mixture should be bubbly and puffed.
In a small bowl or 1 cup measure, combine the remaining ½ cup of flour, baking powder, baking soda and salt. Stir together until blended. Add the flour mixture to the dough and mix until all flour is incorporated. Cover the bowl and refrigerate overnight, or for a day or two, if desired. If rising for more than a day, watch the dough and punch down if needed to prevent overflowing.

To make the cinnamon rolls:
Grease 3 (9-inch) cake pans with melted butter, set aside.
Heavily flour a large, clean work surface. Lightly punch down the dough and scrape out onto the countertop. Using floured hands, and a floured rolling pin, press and roll the dough into a rectangle at least 30-inches wide and about 18 to 20-inches deep. The dough will be very thin.
Brush 12 tablespoons of melted butter over the surface of the dough, leaving a 1-inch border along the 30-inch side farthest away from you.
Sprinkle ⅔ cup of sugar over the butter layer, followed by the ground cinnamon and cardamom.

Roll the dough into a log starting at the 30-inch side closest to you. Gently pull the dough toward you, then tuck and roll, and repeat, keeping it pretty tight as you go. Next, pinch the seams to seal.
Using a ruler as a guide, cut the rolls into (30) 1-inch slices. You can use a large, thin, sharp knife to cut the rolls, or a long piece of dental floss works very well, too. Place the rolls, cut side down, into the prepared pans.

Preheat oven to 375° F.

Let the rolls rise in a warm location for 30 to 40 minutes. Once risen, the unbaked rolls should be puffed and smooth. To ensure the rolls have risen properly, gently press the edge of a roll with a knuckle. If the dough does not quickly and completely fill back into the depression, the rolls are ready. Bake at 375° F until light golden brown, about 15 to 20 minutes.

Transfer the pans to a rack to cool while preparing the frosting.

To make the frosting:
Using an electric mixer or whisk, combine the frosting ingredients and blend until smooth. The frosting should be thick, but pourable. Generously drizzle over the warm rolls. Feel free to go little crazy and don’t skimp on the frosting. Serve immediately.
Recipe Notes
Recipe adapted from Pioneer Woman.


Leftovers can be stored in an airtight container in the refrigerator. For best results bring the chilled rolls to room temperature for 30 minutes before serving.
Unfrosted rolls may be kept at room temperature and frozen.

Sourdough bread and how to feed sourdough starter

Information about how to feed your sourdough starter. 
https://homesteadandchill.com/how-to-feed-sourdough-starter/


What works for me- Once a week, pull the sourdough starter out of the fridge in the morning and let it come to room temperature on the counter. Discard a portion of your starter before feeding. The discarded sourdough can be made into crackers or composted. Now for the 1/4 cup or the 1/2 cup of starter that remains I add 1 cup of flour and 1 cup of warm water to the starter and mix it together. I place a rubber band around the outside of the jar to mark how much starter is in the jar and helps you visualize when your starter has doubled after being fed. I often put my starter jar on a rack in my instant pot on the yogurt setting for a few hours to speed up the doubling process. 


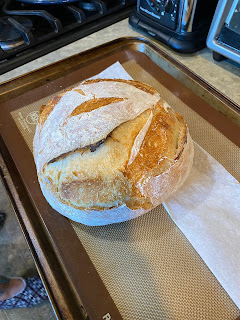
Easy Sourdough Artisan Bread Recipe
Recipe from https://anoregoncottage.com/easy-sourdough-artisan-bread/


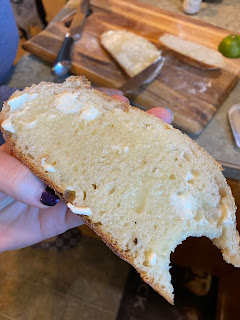
An easy artisan sourdough bread that is mixed up in the morning and baked in an enamel pot for a perfect crust and chewy interior.

Ingredients
3 cups flour white whole wheat, whole wheat, unbleached, or a combo
1 ¼ cups warm water*
3/4 cup active sourdough starter 75%-100% hydration (I prefer 75%)
1 tablespoon honey
1 ½ teaspoons salt

Instructions
Mix all ingredients together in the bowl of a stand mixer (or large mixing bowl) just until combined and then let sit for 15 minutes.
Using a dough hook, knead for 5 minutes. If making by hand, knead for 8 to 10 minutes.
Transfer to a medium-sized bowl, lightly coated with oil. Cover with plastic and let rise for 3 hours, turning and folding the dough once or twice.
Remove dough, turn and fold again, and place it back in the bowl, seam-side up. Let rise for another 2 hours.
After the second rise, place a square of parchment on a cookie sheet and gently shape the dough into a ball or oval (using lots of flour, as the dough is moist) and set on the parchment. Make sure there's a good coating of flour on the top, as this will make slicing the top later easier. TIP: I often shape the dough in a small skillet to keep the edges from spreading as much as a cookie sheet.
While the shaped dough is resting, set an enameled, cast iron dutch oven into a cold oven and turn heat to 450 degrees (alternately, you can use a baking stone), and set the timer for 40 minutes.
When the timer goes off, slash the top of the loaf with a serrated knife (in 2-3 places) and transfer it to the hot pot (or stone) by holding the edges of the parchment to gently lower into the pot (the bread will bake while on the parchment).
Replace the hot lid and bake for 12-15 minutes. Remove the lid and continue baking for another 13-15 minutes, until golden brown.
Remove to a wire rack to cool at least 30 minutes before cutting.

Notes
*You may need less if your starter is wetter- mine is a 100% hydration starter, fed an equal ratio of flour to water.
Slicing Tip: if you don't have a good serrated knife, try using an electric knife to easily slice through crusty artisan bread. It works like a charm and even cuts through warm breads without squishing the crusts like regular knives do.

Wednesday, February 5, 2020

Instant Pot Spaghetti

This is THE BEST SPAGHETTI I have ever had. Cooking the spaghetti in the sauce allows for it to have flavor.

Recipe from here

Ingredients
1 pound lean ground turkey or ground beef or ground Italian sausage
1 teaspoon dried Italian seasoning
½ teaspoon garlic powder
½ teaspoon salt
¼ teaspoon black pepper
2 cups water
8 ounces uncooked whole wheat or regular spaghetti
25 ounce jar marinara sauce see note below


Instructions

  • Turn Instant Pot to saute mode and add the ground turkey or ground beef. Cook, crumbling with a spoon, until browned. Turn Instant Pot off.
  • Add the Italian seasoning, garlic powder, salt, pepper and water. Stir until well combined, scraping up any browned bits from the bottom of the pot.
  • Break the spaghetti noodles in half and lay them in the pot in about 6 parts, with each part laying in a different direction (this is to prevent the spaghetti from sticking together).
  • Pour the marinara sauce over the spaghetti. Do not stir.
  • Seal Instant Pot lid and turn the steam valve to the sealing position.
  • Cook at high pressure/manual for 5 minutes if using whole wheat spaghetti with a package cook time of 7-9 minutes. Cook at high pressure/manual for 7 minutes if using regular white spaghetti with a package cook time of 9-11 minutes.
  • Do a quick release (carefully turn the steam valve to the venting position using the handle of a long spoon and wait for all of the steam to escape and the pin to drop down).
  • Remove lid, stir. You will see some liquid in the pot. This will absorb after just a few minutes. Wait for 3-5 minutes and then serve.
  • Notes
  • Use a good quality marinara sauce that you love the flavor of, as that will impact the flavor of the finished dish.
  • If you want vegetarian spaghetti, leave out the meat and skip the saute step. Put the water in the pot, followed by the seasonings. Then add the spaghetti as directed in the recipe. Pour the sauce over the top of the spaghetti and do not stir. Pressure cook as directed in the recipe.


Wednesday, January 29, 2020

Cold Start Yogurt Instant Pot


Ingredients

  • 52 ounce Fairlife Milk (Ultra-filtered & Ultra-Pasteurized)
  • 2 Tablespoon Fage Greek Yogurt (plain)
  • 1/2 can Sweetened Condensed Milk

Directions
  • Pour a small amount (approx. 1-2 cups) of milk in the bottom of the container and add the yogurt and the condensed milk to the pot.  Whisk until all the milk, yogurt and milk are completely combined.  Once combined add the remaining milk to the pot.
  • You do not need to add the top of the pot to the container.  I place a splatter shield over the top. Push the yogurt button and set the time to 8 hours and make sure the setting says "Normal." I like to make yogurt at the end of the night so in the morning the yogurt is ready to go.
  • Once the cycle is completed take a paper towel to the top of the yogurt and the sides of the bowl to absorb the condensation. 
  • Place the yogurt into smaller containers and chill for multiple hours.  You can serve with jam or fruit.

Sunday, January 19, 2020

Sous Vide Corn on the Cob

Who doesn't love corn on the cob?  It is the first thing I crave every summer.  I used to boil my corn or put it on the grill. When I got my Mellow I tried to sous vide corn.  I have never looked back!  It is a super simple recipe.


Take 2-3 corn cobs without the husks and place in a vacuum seal bag.  Add a tablespoon of butter to the bag and place in the vacuum sealer to remove the air out.  Cook the cobs on the sous vide machine for one hour at 180 degrees for one hour.  Remove the corn from the bag and butter as needed.


Wednesday, January 15, 2020

Franken Turkey Chicken Sous Vide Thanksgiving

**When you buy a turkey for Thanksgiving make sure you don't buy a quadriplegic turkey.  Otherwise, you will have to go out shopping for Chicken thighs and wings so make a whole franken bird.


This isn't a full recipe for anyone else other than me so I can remember how I did this again for next year.  Never make turkey any other way!!!!!!

Step one- Spatchcock turkey 2 days in advance. Separate wings and drum sticks. Salt rub the bird with salt, poultry seasoning and pepper. Optional- add sage leaves to the bottom side of the bird.  Place in a vacuum seal bag and seal. Seal dark meat separately.

Step two- Set the sous vide machine to 151 degrees.

Step three- put dark meat (legs and wings) in the sous vide for 6 hours. Take out and place in ice bath. Place in Fridge

Step four- Adjust the temperature to 143.5 degrees. When the desired temperature is reached add the breast for 4 hours. Place in ice bath and into the fridge when done.

Step 5- Thanksgiving day.  Reheat sous vide to 143.5 and reheat both white and dark meat for 40 minutes.

Step 6- When done. Remove from bags and save the drippings for gravy. Brush the turkey with butter and place on a rack with a cookie sheet underneath.

Step 7- Roast in the oven at 450 degrees for 10 minutes.  Pull out when you have reached the desired color.


Make this gravy

Ingredients

  • 4 cups turkey broth
  • ½ cup unsalted butter
  • ½ cup all-purpose flour
  • 1 teaspoon salt
  • ½ teaspoon pepper

Instructions

Pour turkey broth into a medium saucepan and heat until warm.NOTE: You don't have to bring the broth to a boil just until steamy and warm. In a large skillet melt the butter. Sprinkle the flour over the butter and whisk together. Continue cooking and whisking until the flour has become brown. Add warm broth a ladle at a time to the flour mixture whisking as you go. TIP: Make the gravy thinner than you want because when the gravy cools it will thicken up. Or if you're making the gravy ahead of time save some of the broth for when you re heat the gravy. Add salt and pepper.

Wednesday, January 8, 2020

Gluten-Free Churros


I had an amazing extended weekend at the Oregon Coast recently and we celebrated a great friend's birthday.  She has a childhood story about her experiences with churros and I wanted to make her a gluten-free version of these crunchy dough delights.  You couldn't tell they were gluten-free!

Gluten-Free Churros
This place is so relaxing and we will be back!


Prep Time: 15 minutes
Cook Time: 4 minutes
Total Time: 30- 45 minutes to make the entire recipe
Yield: approximately 25 churros, depending on size

INGREDIENTS
1 cup + 2 Tbs. milk of choice
7 Tbs. butter
½ tsp pure vanilla extract
1 cup Gluten-Free All-Purpose Flour(I used Bob Mills 1:1)
1 tsp baking powder
1 ½ Tbs sugar
¼ tsp salt
¼ tsp cinnamon
2 eggs
Mild, high heat oil, for frying
¼ tsp ground cinnamon
½ cup sugar


INSTRUCTIONS
Whisk the Flour in a large mixing bowl with baking powder, salt, cinnamon and 1 ½ tablespoons sugar.

Heat milk together with the butter (cut the butter into smaller pieces before adding to help them melt faster) in a large saucepan on the stove. Heat gently and as soon as the mixture boils, remove from heat.

Pour mixture into large mixing bowl with flour. Stir until combined, either with a wooden spoon or using an electric mixer.

Allow to cool for 5 minutes, then add eggs or substitute, one at a time with vanilla, mixing until incorporated. The dough should be thick and sticky with air pockets but not so thick that it cannot be piped through the bag. If it is too thick, add more milk, 2 tablespoons at a time.

At this point, the batter may be fried or covered to rest in the refrigerator for up to 24 hrs.

Fill a deep saucepan (at least 12 inches wide) with three inches of oil. Heat until it reaches 350°F on a candy thermometer. Cover a wire rack or tray with paper towels.

In a small bowl, mix the remaining sugar and cinnamon.

Fit a 1M star tip to a piping bag or a large plastic bag and cut the corner out to fit the tip.

Fill with the dough, then pipe directly into the pan, cutting off each dough strip with a knife.

Fry until light brown and crisp – approximately 1-2 minutes per side — then remove with a slotted spoon and drain on the paper towel-covered rack.

Pipe more churros into the oil and then transfer the cooked churros to a tray with the sugar and cinnamon mixture. Toss gently then remove to parchment to finish cooling.

Recipe from gfjules.com

Wednesday, January 1, 2020

Gluten Free German Chocolate Cake


Gluten-Free German Chocolate Cake

I made this cake for a birthday party at the coast. It was AMAZING.  You don't even miss the gluten in this cake.  It is a time-consuming cake to make but this is a recipe to save.  You could even skip the coconut frosting and just make it a chocolate cake. 


Ingredients
For the Cake
1 3/4 cups all-purpose gluten-free flour (Bob Mills 1:1)
2 cups granulated sugar
3/4 cups cocoa powder
2 teaspoons baking soda
1 teaspoon baking powder
1 teaspoon fine sea salt
1 cup buttermilk (or 1 cup unsweetened coconut milk + 1 tablespoon white vinegar)
1/2 cup avocado oil (or canola oil)
2 large eggs, room temperature
2 teaspoons pure vanilla extract
1 cup hot coffee

For the Frosting
1 cup butter, softened
3 cups powdered sugar
1/2 cup unsweetened cocoa powder
1 teaspoon vanilla extract
1/4 cup heavy whipping cream

Coconut-Pecan Topping
1 cup evaporated milk
1 cup white granulated sugar
3 egg yolk beaten with 1 teaspoon water
1/2 cup butter or margarine
1 teaspoon vanilla extract
1 cup chopped pecans
1 cup flaked coconut
1 tablespoon cornstarch


Instructions
To make the Cake:

Preheat oven to 350 degrees and spray 2 8-inch cake pans with non-stick spray. Line the bottom of the pans with parchment paper and spray that parchment paper with non-stick spray.
In the bowl of a stand mixer, sift together the flour, xanthan gum, sugar, cocoa powder, baking soda, baking powder and salt. Use the paddle attachment to mix the dry ingredients on low speed.
In a separate bowl, whisk together the eggs, buttermilk, oil and vanilla. With the mixer running on low speed, slowly pour the wet ingredients into the dry ingredients. Mix until completely combined.
Scrape down the sides and bottom of the bowl and pour in the hot coffee. Mix on low until incorporated.mPour the batter (it will be very thin and pretty liquidy) evenly between the two pans. Bake at 350 degrees for 35 - 40 minutes. (Mine take about 37 minutes.) Cool the cakes on a wire rack (in the pan) for 20 minutes. Carefully remove the cakes from the pans and cool completely on a wire rack. When the cakes are cool, prepare the buttercream.

To make the chocolate buttercream:
Add the butter to the bowl of a stand mixer and beat until completely smooth. Add the powdered sugar and cocoa powder and mix on low to combine. Mix in the vanilla extract and heavy cream.
Turn the mixer to a medium-high speed and beat for 1-2 minutes or until the frosting is light and fluffy.


Coconut-Pecan Frosting:
In a large saucepan combine evaporated milk and cornstarch and mix; add in sugar, egg yolks, margarine, and vanilla. Cook over low-medium heat until it reaches a slow boil. Stirring constantly until thick, about 12 minutes from when it starts to slowly boil. Remove from heat and stir in pecans and coconut, this frosting will thicken up as it cools.
Let cool 1 hour then spread on cooled cake.

Frost the bottom layer with buttercream, then add the second cake layer, and then frost the entire outside of the cake.  Add the coconut-pecan frosting topping and chill take cake for at least 30 minutes to make cutting the cake easier.


Cake adapted from whattheforkfoodblog.com
Coconut Frosting from dashofsanity.com